How to set up a new Carousel Intel NUC
This article explains how to set up a Carousel Intel NUC
1. Image the NUC using the EDU 21H2 image.
2. Install Windows updates.
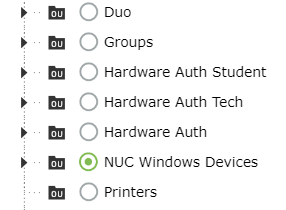
3. Rename the device and move it to the "NUC Windows Devices" OU in AD and run gpupdate /force in cmd prompt.
4. In SCCM - add the device to the "Carousel NUCs" and "Servers/Devices Managed by SCEP" collections.
5. Set up a local admin account on the device.
Username: Carousel
Password: Carousel
6. Use Registry Editor to set the local account to automatically log in. https://learn.microsoft.com/en-us/troubleshoot/windows-server/user-profiles-and-logon/turn-on-automatic-logon
7. Open Group Policy Editor on the device, navigate to Local Computer Policy -> Windows Settings -> Security Settings -> Security Options. Find "Interactive Logon: Message Text" and "Interactive Logon: Message Title", double click on each of them and delete the text from the message box. Click Apply, and then OK.
8. In Windows Power & Sleep settings, set the Screen and Sleep to timers to "Never".
9. Open "Task Scheduler".
Click "Create Basic Task". Name the task "Reboot", click next.
Set the Trigger to "Daily", click next. Set the time of day to 12:00:00 AM, recur every 1 day. Click next.
Set the Action to "Start a program", click next. In the Program/Script text box, type "Shutdown /r", click next, then click finish.
9. Install the Carousel digital signage application, located in \\ccsfp\tech\Applications\Carousel
10. Start the Carousel app and click Configure.
Enter the server URL: tightrope.calschools.org
Check the Synchronize Time box
11. The device will automatically be populated into the list of Players in the Carousel settings page based on the device name. Set the Player's Channel by clicking the edit button ![]() http://tightrope/Carousel/settings/players/dashboard
http://tightrope/Carousel/settings/players/dashboard
No Comments